Kaleslaw

As of last week’s Farmers’ Market stop, Tuscan kale (dinosaur kale) is my new favorite vegetable. It’s a flatter, darker version of the common curly-leafed kale and is full of culinary potential.

Food nerd that I am, I did a little research and found that it not only is incredibly healthy but it incidentally ranks pretty high on Michelle Obama’s list of favorites as well…so much so that she has gone to great lengths to stock up. While we may share tastes in produce, our styles of grocery shopping are not so similar; I usually leave the Secret Service and bomb-sniffing dog entourage behind on my veggie runs.

Even if you don’t think of yourself as a kale fan, I think (along with Michelle Obama perhaps) that you need to give it a try. Here’s one way of preparing it that should please even the most reluctant taste buds:

1/4 cup olive oil
2 heaping tablespoons apple cider vinegar
1 Tbl lemon juice
1/4 cup dates, chopped (I used the kind that is coated in oat flour)
3 cups Tuscan kale
1 medium carrot, grated
1/4 cup green onion or leek, finely sliced
1/4 cup walnuts, chopped
dash of cayenne pepper, salt, and ground mustard

Measure out the liquids and let the dates soak in it for a few minutes while you prepare other things. Wash 10 or so leaves of kale thoroughly. With a sharp knife, remove the middle ribs of the leaves (they’re tough and fibrous) and then cut the tender part of the leaves into thin slices (chiffonade). Once you’re done cutting and chopping the vegetables, combine them in a bowl. If you’d like a little more sweetness and texture, throw in an additional 1/4 cup of chopped dates.

In an electric blender, blend the oil/vinegar/lemon/date combination until you stop seeing large chunks of dates. Add the dry spices to the liquid and taste (adjust accordingly). Finally, add the liquid mixture to the bowl of other ingredients and mix it up so that the liquid is lightly coating all of the kale.
You can serve this on its own as a little salad, top a sandwich with it…really you can use it like you would a normal coleslaw. The dates give it the traditional coleslaw sweetness, the vinegar and lemon give it the tang, but neither flavor should be overpowering. And there is no dairy or refined sugar in it!

The liquid acts like a marinade–it tenderizes the leaves, and the flavors settle in together over time.
Since the kale is pretty tender on its own you can eat this almost right away, but a few hours (or more) in the fridge will do it a favor.

Enjoy!

Video and a New Site

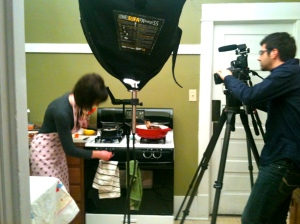
Thanks to the help of some VERY talented friends, I have a new site and a few how-to videos.  Brenden Greenwood designed the new site and logo.  Tristan Carnahan of Sulva Productions shot and edited the videos (with the aid of cameramen Andrew Laparra and Stefan Green). You should check out their sites.

You should also check out the new kitchen!  From now on I’ll be posting at www.karyns-kitchen.com.

Here’s one of the videos.  It shows how I make pie crusts (as taught by my grandmother the pie queen)…and a link to therecipe.  Please note a couple things I forgot to explain: 1) you can patch the pie crust if it breaks by dipping your fingers in some water and squishing excess dough onto the problem area, and 2) you’ll need to poke little holes in the top crust once the pie is assembled so it won’t blow up like a balloon. A fork or knife will do.
Enjoy!

Pomegranate Red Velvet Cupcakes

One of my favorite things to do in the kitchen is to find ways to use the odds and ends that end up in my fridge. Last week it meant that three big bags of asparagus stalks became soup for 200 (look for a post soon!). But this week’s featured ingredient, pomegranate concentrate, wound up in the best possible venue–a cupcake.

I adapted a recipe for red velvet cake found on the POM wonderful website.  Here’s my spin on it:

1.Set the oven to 350.

2. Mix the dry ingredients in a bowl.

  • 2 1/4 cups flour
  • 2/3 cups cocoa powder (or more to taste)
  • 2 tsp baking soda
  • heaping 1/2 tsp salt

3. Beat butter and sugar well, then gradually add the vanilla and eggs.

  • 3/4 cup unsalted butter (soft)
  • 1 1/2 cups sugar
  • 3 eggs
  • 2 tsp vanilla

4. Measure pomegranate concentrate, water, vinegar and cream, and mix them together.  Set aside.

  • 1/4 cup pomegranate concentrate…you could also use pomegranate juice and reduce it
  • 1/2 cup water
  • 1 tablespoon apple cider vinegar
  • 1 cup cream or half and half

5. To the butter/sugar mixture, add a a third or so of the dry ingredients and mix well.  Then add some of the liquid mixture. Continue alternating and mixing until everything is combined.

6. NOW is the fun part when baking can be more like art. Measuring goes out the window here, and you are armed only with your eyes, taste buds, and common sense!  Taste the batter to see if it’s chocolatey enough for your liking…if not add a little more cocoa powder (it might end up closer to 3/4 cup). Then assess the color situation.  If it still looks like chocolate cake batter, add red food coloring (and maybe additional pomegranate concentrate as long as its flavor doesn’t take over). Keep adding and mixing until it looks more rosy/mauve.  Remember that it will get darker as it bakes.

7. When you’re pleased with the color, spoon the batter into cupcake tins (with cupcake liners) about 2/3 full. Bake for 25-30 minutes or until a knife comes out clean.

After the cupcakes cool for about 15 minutes you can frost them with this tasty cream cheese frosting:

  • 8 oz. cream cheese (room temp)
  • 1/3 cup butter (room temp)
  • 1 hearty tsp vanilla
  • a few dashes of salt
  • powdered sugar

Using a mixer, cream the butter and cream cheese together.  Add the vanilla, salt, and then gradually add the sugar until it reaches the right consistency and sweetness (which means you HAVE to taste as you go!  Oops.).  I hate to give an amount here, but I’d say about 1 1/2 cups.

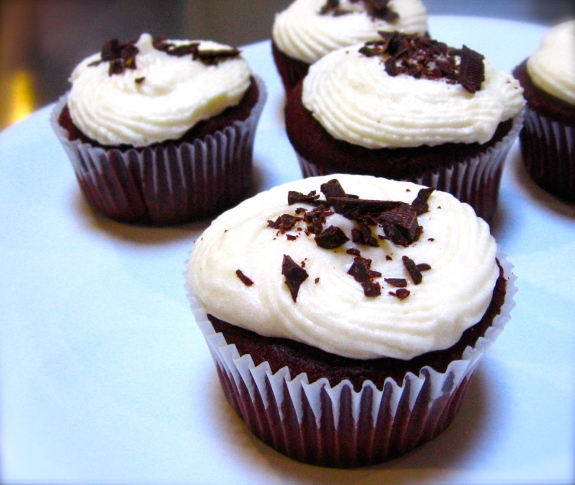
I don’t like a ton of frosting, so if you do, you may need to make more!  I think the amount pictured above is just right though because it still allows you to notice the dark, subtly sweet notes of the cake…also reinforced by the chocolate shavings (75% cocoa) on top.

Enjoy!

The Kitchen Still Lives

I have not fallen off the face of the earth, lost all sense of taste, or quit cooking.

Here are the real reasons why I’ve taken a breather from the blog:

I’ve been…

  • Looking for jobs, starting two. One is at a test kitchen and the other is at a French restaurant downtown.  I’m so thankful for these jobs and the diverse experience they offer!
  • On a budget. Especially after a couple months of job-searching, the sky is not the limit in the grocery store. This has meant a few not-so-blog-worthy meals for me, but it has also forced me to be more strategic than ever…good for the creative juices.  And I now love lentils.
  • Cooking at night. Because of a different schedule, it’s a challenge sometimes to cook in the daylight hours (best for photos).  Any tips for getting around this one?

BUT  I have also been…

  • Making a few videos. Thanks to some amazing, talented guys, you can expect to see some short cooking videos soon.
  • Gearing up for a new site. Tweaked look, better organization.
  • Checking out some restaurants. Instead of just making my own stuff, I’ve started exploring the great food scene here in the Twin Cities…and want to post about it here from time to time. Have any favorite spots or know of a hidden gem? I’d love to hear!

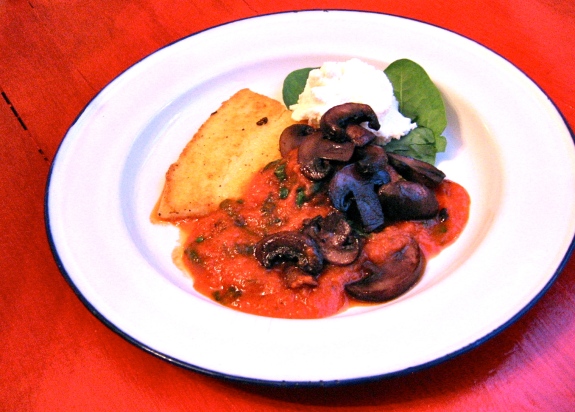
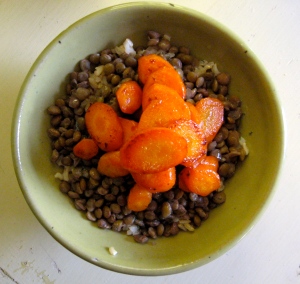
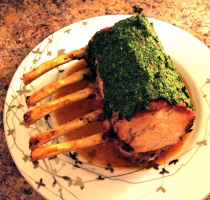
And I am still cooking.  Really.  (Proof below).

Have a great Friday!  See you soon…


(top: parmesan polenta, below: whole wheat couscous with roasted vegetables and ham; oatmeal with apple compote; brown rice with lentils, naturally glazed carrots, and dill sauce; pork roast with herb crust and jus)

Valentine’s Tilapia


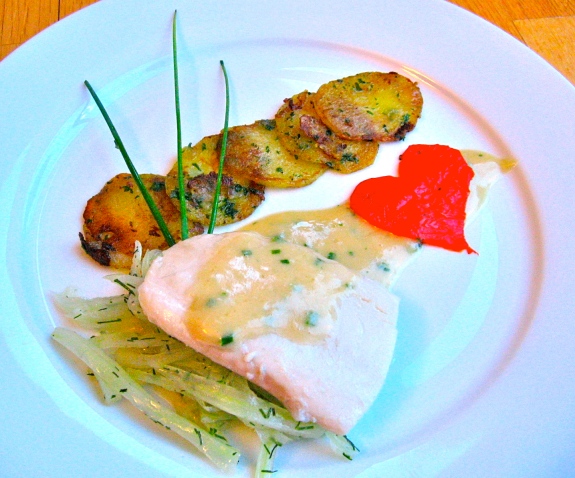
Seafood and Valentine’s Day go hand in hand…crab, lobster, anything from the sea and preferably in a shell.  But this year my budget didn’t have room for crustaceans, so I went to my favorite fish market (Coastal Seafoods) and picked up some tilapia.  If you live in the cities and haven’t been there, you definitely need to check it out!

Here’s what I did:

  • 1 Tbl butter
  • 1 shallot, finely chopped
  • 3 tilapia filets, halved the long way (if large)
  • dry white wine
  • fish stock
  • whipping cream
  • refrigerated unsalted butter
  • chives

Lightly butter a glass 9×13 pan.  Sprinkle the shallots over the bottom.  If the tilapia filets are thin, fold them over once.  Lay the filets in the pan and pour in enough white wine to just cover the bottom.  Pour in enough fish stock to go half-way up the filets.  Bake at 375 for 10 minutes or so (until they are opaque and can flake with a fork).  When they’re done, remove the filets and cover them with aluminum foil until you’re ready to serve.

For the sauce, strain the liquid from the pan into a small pot and reduce (boil so that much of the water evaporates leaving a more concentrated liquid).  Once it is significantly reduced (almost like a glaze), add a splash of cream.  Keep it boiling lightly.  To finish the sauce, add Tablespoon-sized pieces of cold butter one at a time while whisking. Once it reaches a light buttery color take the pot off the heating element.  Taste for seasoning.  Chop some chives and mix them into the sauce when you are ready to serve.

For the garnishes…

I stewed thin slices of fennel bulb with a dash of salt and sugar, and the Valentine heart is a piece of roasted red pepper cut with a paring knife.  This fish goes well with rice, couscous or boiled potatoes.

Happy Valentine’s Day!

Shirley Bars

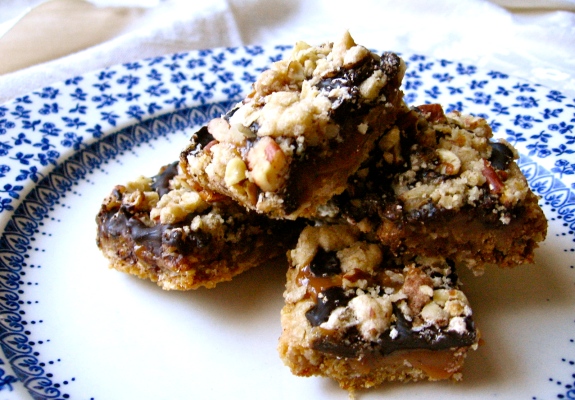
For those of you who are not from the Minnesota northland, let me explain this dessert we like to call “bars.”  These treats are serious business.  They’re essentially the most decadent components of other desserts packed into one solid 9×13 piece–dessert concentrate.  Although bars are known to run with shadier characters like hot-dishes and jello “salads,” I’m convinced that they can also hold their own in an elegant spread.  Others seem to think so too.  If you don’t believe me, check out Bars Bakery in St. Paul!

There are lots of bars out there, but hands down my favorite kind is the kind that my great aunt Shirley makes–one full of carmel, chocolate, oats, and pecans.  After indulging year after year at family gatherings I finally asked her for the recipe and added a couple of my own twists.  Thanks, Shirley!

Melt these on a low heat, stirring as necessary:

  • 36 unwrapped caramels
  • 4 Tbsp. milk
  • 3 Tbsp. butter

Mix these together:

  • 3/4 cup brown sugar
  • 3/4 cup softened butter

In a different bowl mix these and add to the butter and sugar:

  • 1 cup flour (can use white or whole wheat)
  • 1 cup oatmeal
  • 1 tsp. baking soda
  • 1/2 tsp. salt

Take about 3/4 of the mixture and press it into a 9×13 pan–just enough to cover the bottom.  Bake it at 350 for 9 minutes (or until it is slightly browned).  Cool for a few minutes and then pour the melted caramel on top. Then spread

  • 1 cup dark chocolate chunks  (I like 70% cocoa but I’ve also used semi-sweet chocolate chips)

over the caramel, followed by the remaining oat mixture.  Finish it off with

  • 1/2 cup of chopped pecans or walnuts

Bake it for 15 minutes.

Enjoy some Minnesota goodness.


Kale and Bean Winter Soup


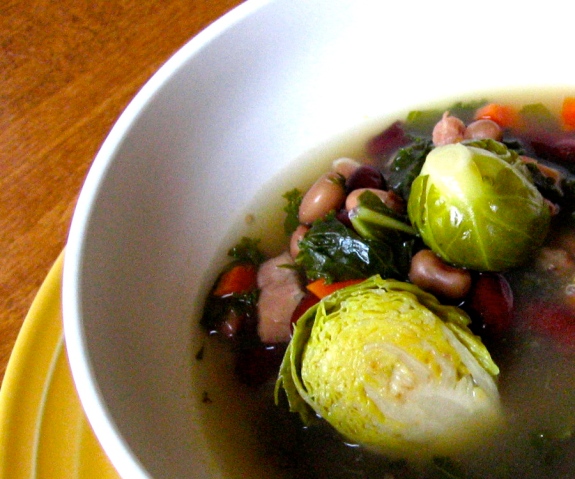
Leftover ham, kale, and the cold weather we’ve been having here in Minneapolis inspired this soup.  With both kale and brussels sprouts, it not only warms you up but also gives you plenty of the vitamins that are needed around this time of year.

Here’s what you’ll need:

  • butter or oil
  • 5 pieces of thick bacon cut into strips or the equivalent of cooked ham (I’ve used both)
  • 1 small onion, finely chopped
  • 1 good-sized garlic clove, minced
  • 1 carrot, thinly sliced
  • 1/2 to 1 whole bunch of kale, stems removed, cut into thin strips
  • 12 or so brussels sprouts, larger ones cut in half
  • 4 or more cups water
  • chicken or vegetable stock
  • 1 can kidney beans, rinsed
  • 1 can black-eyed peas or white beans, rinsed
  • salt
  • optional variations: diced tomatoes, red pepper flakes, white pepper, bouquet garni

Cook the pieces of bacon in a large pot. If you are using cooked ham simply brown it lightly in a little butter or oil. While you’re cooking the meat, heat a little butter in a skillet on medium heat.  Place the brussels sprouts in it until they start to brown; set aside. Add the garlic and onion and sweat (use a low enough heat that it cooks but doesn’t turn brown). Next add the carrot. Once this has started to get tender, add the kale and brussels sprouts. Stir so that the kale is exposed to the heat and wilts.  Now add water and bring up to a slow simmer. For more flavor, top it off with some stock until it seems like there is a good liquid/solid ratio.  When this has simmered for a bit (enough for the flavors to meld), salt to taste, add the beans, and simmer for 10 more minutes.  Remove from heat.

Enjoy!

Kale and Bean Winter Soup on Foodista

Date and Walnut Cheese Spread

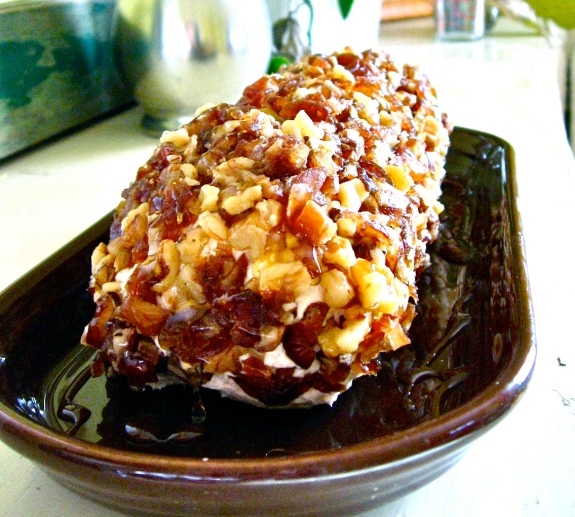
No need to choose between sweet and savory; this spread combines the best of both worlds.  I served it with crackers for events the last couple of weekends, and I think it bridged the gap well.  And even better–it’s easy to make and can be done ahead of time.

Here’s what it involves:

  • 3 packages of cream cheese (8 oz.)
  • 1/3 cup brown sugar (or less)
  • 1/2 tsp. chili powder (to taste)
  • dash of salt
  • 1 cup walnuts (chopped)
  • 1 cup dates (chopped)
  • honey, maple syrup, or agave syrup

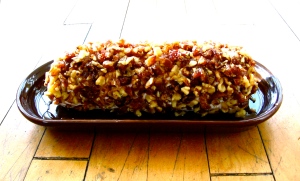
Let cream cheese soften on the counter for a bit before you begin.  Once it is manageable, put it in a bowl and use a spatula to mix in the brown sugar, chili powder, and salt.  At this point you’re faced with a decision: two cheese balls or one log?  This past weekend I went the log route to save table space.

For a log:

Spoon the cream cheese (roughly in a log shape) onto some plastic wrap.  Roll it up in the plastic wrap, and then whack it on the counter and spin it around by holding the ends of the the wrap until you get the most uniform shape possible….like you’re making a sausage.  Chill it in the refrigerator. When it’s ready, roll out of the plastic wrap onto your plate (or garnish first while it’s still on the wrap for a cleaner look)

For cheese balls:

Starting with spoons dipped in warm water and finishing with very clean hands, shape into two balls.  Put each one on a plate or on a bit of plastic wrap before garnishing.

To finish:

Evenly pack the chopped dates and walnuts on the sides and top of the cream cheese mixture, plate it, and lightly drizzle honey or a natural syrup on top.

Enjoy!


Dates- تمر on Foodista

Dairy-Free Herb Dip

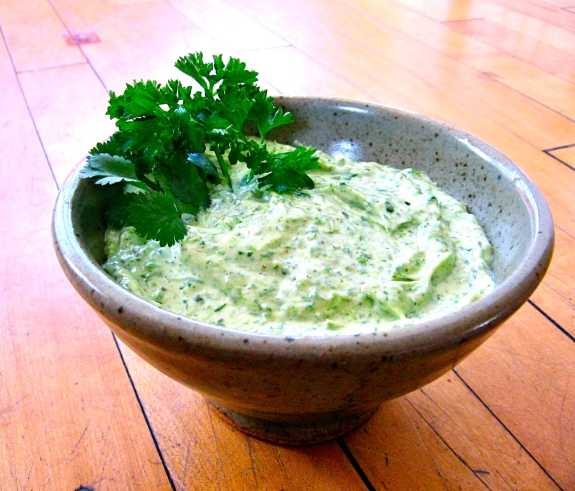
…A.K.A. my twist on green mayonnaise.  Especially with dairy allergies and intolerance so prevalent, this smooth, herb-rich dip is a great addition vegetable trays and sandwiches.  It also goes well with different kinds of white fish.  We just had a housewarming party, and I served this with a tray of carrots, mushrooms, pea pods, and cauliflower.

I started by making a basic mayonnaise. If you’ve never made mayonnaise before, it’s definitely worth a try.  As long as you don’t rush the oil-adding process it’s not difficult, and it’s richer than the kind you can buy.  And the good news is that the whole process can be done in less than ten minutes:

  • 2 egg yolks (the USDA recommends using pasteurized eggs to be safe)
  • 1/2 tsp salt (or to taste)
  • 1 Tbsp mustard (you can use ground if you don’t have the normal kind)
  • 1 cup oil (canola, vegetable, olive)
  • dash of rice vinegar

In a medium bowl, whisk the yolks, salt, and mustard together.  Add a Tablespoon or so of oil and whisk that vigorously enough that you no longer see oil but just a thick, lemony substance.  Keep adding oil and whisking gradually.  At some point, add a little vinegar if you don’t mind the flavor.

This is an emulsion (a blend of two things that don’t naturally want to combine), so you need to be careful not to overwhelm the yolk with too much oil all at once.  If you do, it will cease to be mayonnaise and become pieces of egg yolk in oil.  But if you introduce the oil gradually and whisk consistently to maintain the pudding-like texture, and you’ll be fine.

After you’ve made the mayonnaise, you can add the herbs.  This isn’t a science and really could be done however you like with whatever herbs you have on hand…but as a point of reference here’s what I did:

  • big handful of parsley
  • A few stems of fresh tarragon (just the leaves)
  • A few stems of fresh thyme (just the leaves)
  • 1 whole garlic clove
  • salt
  • A spoonful of course ground mustard

For the maximum green effect, I first blanched the parsley, tarragon, and thyme.  Bring some water to boil (with just a dash of salt and a garlic clove), drop the herbs in the boiling water, remove them by pouring the contents of the pot through a strainer, and douse that in cold water.  Put the blanched herbs and softened garlic clove in the blender, add the mustard and some of the mayonnaise, and blend away.  Once the herb mixture reached a good consistency, incorporate it with the rest of the mayonnaise and let it sit in the refrigerator for a few hours.  This is a more rustic version of green mayonnaise.  If you were having green mayonnaise in France, you would not be able to see any herbs in the final product. But blame it on my American makeup–I don’t mind a little texture.

When you serve this, you’ll need to keep the dip cool if it’s going to be out for a while.  If it’s in a bowl, you can just place it in another larger bowl with some icy water.

Enjoy!

Whole Wheat Crackers

I promise I will not keep posting recipes for round crunchy things, but I had to write about these crackers…especially since they go so well with the the salmon spread and roasted red pepper hummus that have also made their way to the blog recently.  Without a ton of work they add a special touch to any appetizer spread or winter soup, and I even think they’d work as a hostess gift.  Not a bad change from the sweets that are so available this time of year!

Here it is:

  • 1 1/2 cups whole wheat flour (or a blend of white and wheat)
  • 1/2 tsp salt
  • 1/3 cup oil
  • 1/2 cup milk
  • 4 tsp real maple syrup (can also use sugar, honey, or a little less agave syrup)
  • egg wash (1 beaten egg thinned with water)
  • toppings (sea salt, sesame seeds, poppy seeds, parmesan cheese, dried herbs, garlic salt, etc.)

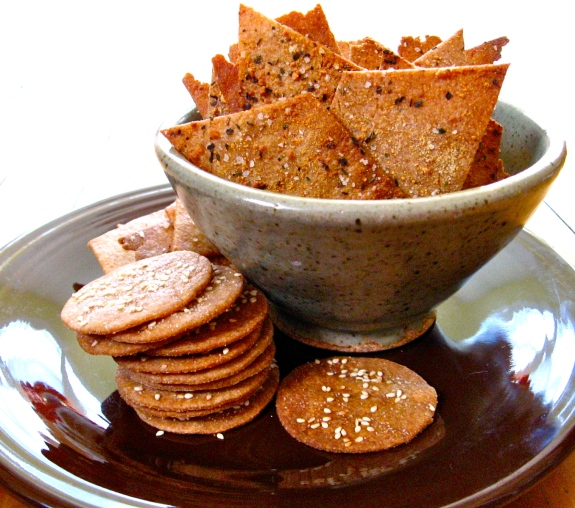
Mix the flour and salt together in a bowl.  In a separate bowl, combine the oil, milk, and syrup.  I usually err on the generous side with the oil if I’m using all whole wheat flour.  Pour the liquid into the flour and mix just until combined.  Take a third or fourth of the dough and lightly form into a ball using a little flour if it’s too sticky. Roll it out as thinly as possible on parchment paper–no more than 1/8 inch thick. Cut irregular shapes with a pizza cutter or cut out rounds with a mold.  If you use a mold, remove the excess dough leaving the rounds on the paper. Brush the top of the crackers with an egg wash and sprinkle on your toppings.

Place the parchment paper on a baking sheet and bake at 300 F until they start to get brown.  It usually takes me 20-30 minutes (depending on the oven, thickness, dryness of the dough, etc.).  Place them on a rack to let them cool and get crispy.

This time I did one batch with sea salt (thanks, Jo!), one with garlic salt, parmesan, and basil, and one with sesame seeds and a little fine salt. If you have other ideas for toppings or if you have a favorite cracker recipe, I’d love to hear!

Enjoy.